

Object of the Game
The object of chess is to use your pieces to attack the opponent’s King so it is trapped and cannot escape capture.
To “attack” means to put any piece where it can “see” the King directly.
A King under attack is in “check” and must escape that attack immediately.
A King can try to escape “check” in 3 ways: move the King to a safe square, block the attack with a friendly piece, or capture the attacking piece with a friendly piece.
If the King cannot do any of that, then this is “checkmate” and the game is over.
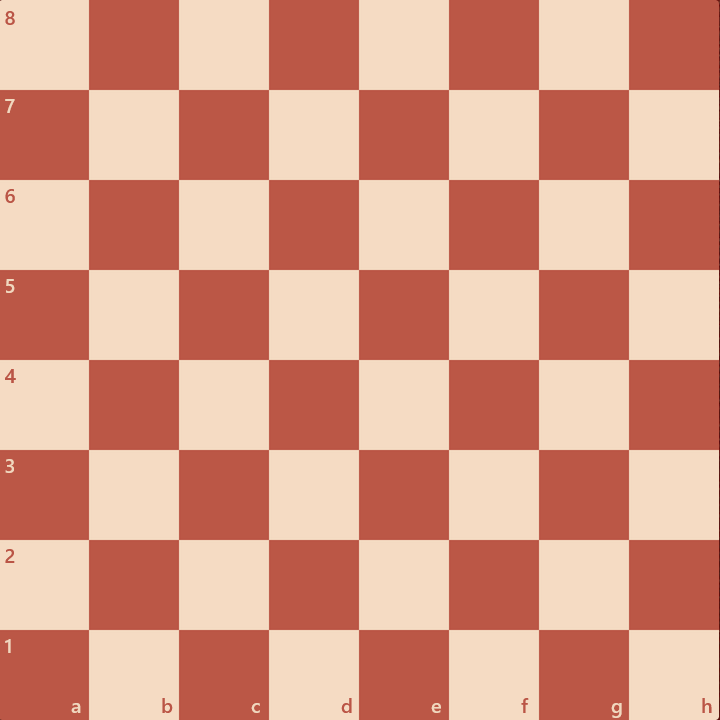
The Board
Chess is played by 2 players on a board that has 64 squares, 8 rows of 8 squares, alternately colored light and dark. The players sit on opposite sides of the board oriented with a light square in the bottom right corner.
The board is like a grid. The horizontal rows are called “Ranks” and are labeled 1-8. The vertical columns are called “Files” and are labeled a-h. This gives each square unique coordinates: “a1” “f6” “e4” etc. White pieces start on the 1st and 2nd ranks and Black starts on the 8th and 7th ranks. More on this later.
Starting Position
Each player starts with an “army” of 16 chess pieces. The two armies are of contrasting colors and referred to as “White” and “Black”.
Each army has 1 King, 1 Queen, 2 Rooks, 2 Bishops, 2 Knights, and 8 Pawns arranged like this: Pawns are in front and behind them, from outside in, are the Rooks, Knights, Bishops, King & Queen. The Kings and Queens are in the center, and the Queens are placed “on their color.”
In diagrams, White is usually shown on the bottom:
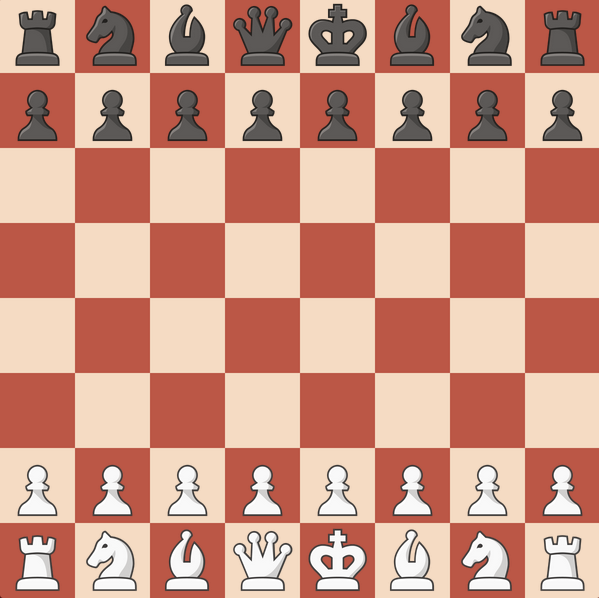
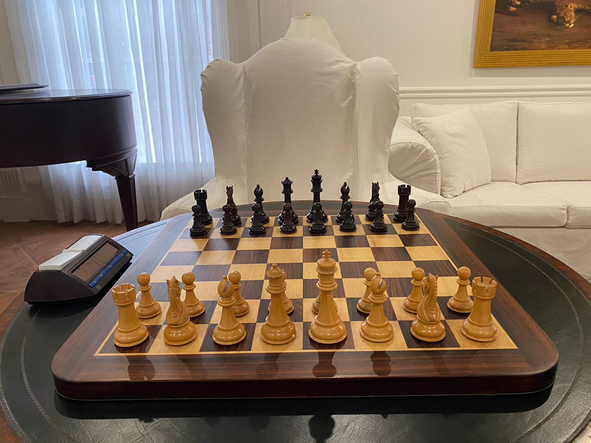
Fun Fact: Notice the mirror image set up, and when playing chess in person, you’ll also notice that the standard pieces appear in height order.
Moving and Capturing
Chess is a turn based game of logical piece movement and White moves first.
To Move : transfer one of your pieces from it’s current square to another open square.
To Capture : move one of your pieces to a square that is occupied by the opponent, remove their piece from the board, and put yours there.
You may only make one move or capture per turn.
Each piece has a unique movement ability and range.
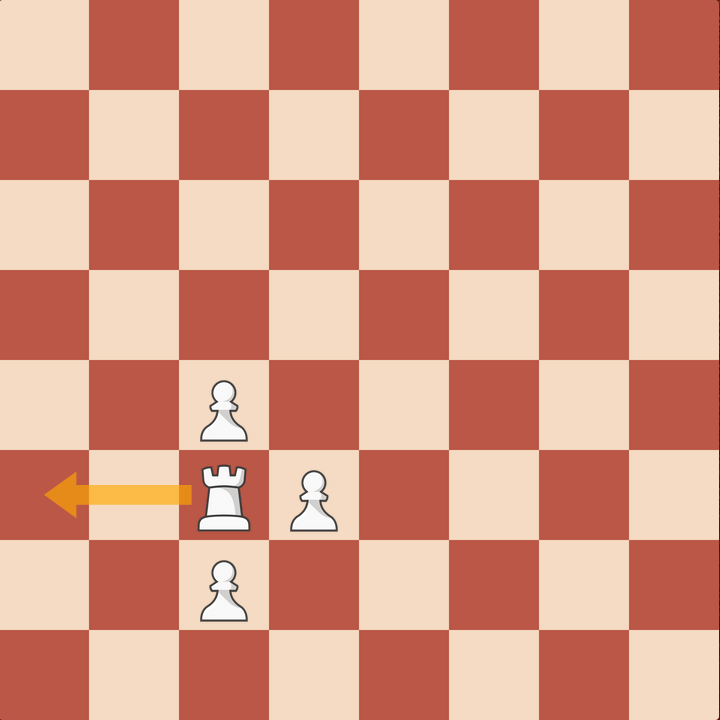
All pieces even the King can capture an opponent that is in their range. A piece with a long range must stop where it makes a capture and cannot go through another piece.
Note: a) You cannot move or capture through an occupied square. b) you must make 1 move but you don’t have to move or capture with a specific piece just because you can. c) You cannot capture your own pieces.
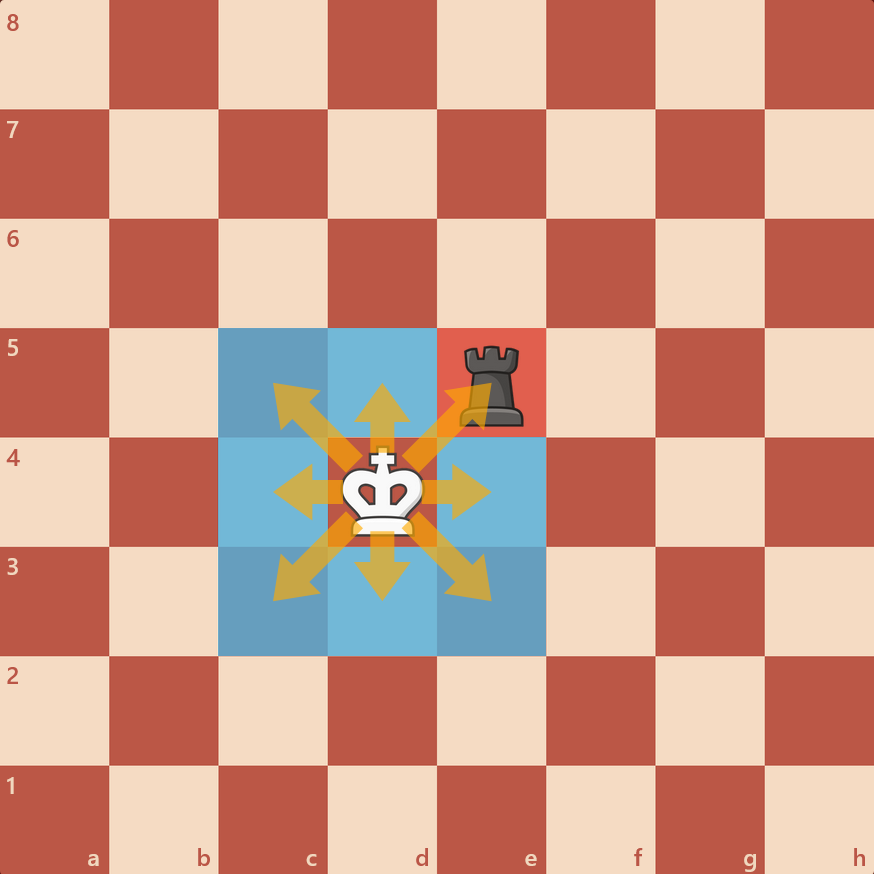
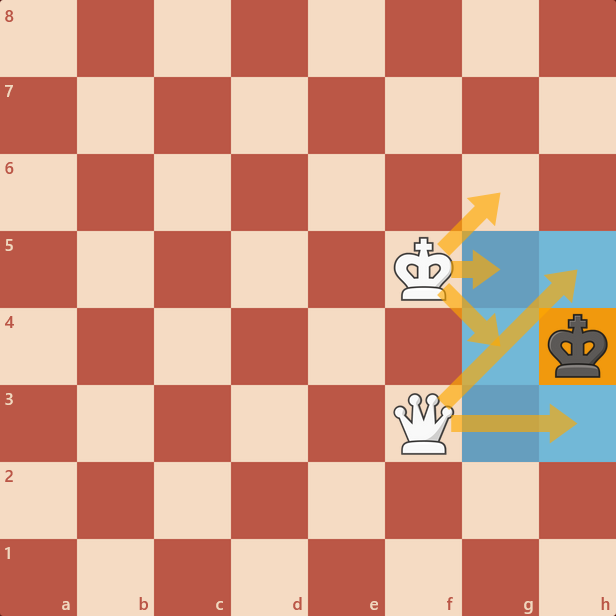
The King

The King can move one square in any direction and capture any opponent in range.
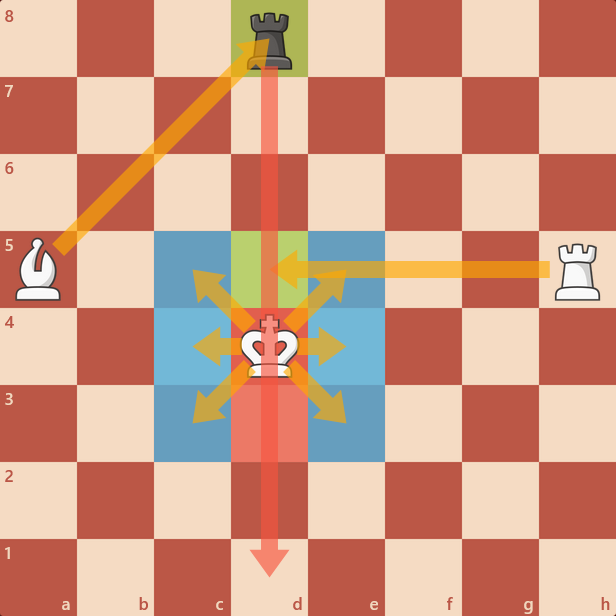
The King can never occupy a square that is being attacked. This is the most critical rule in chess. If we’re attacked we must move, block, or capture the attacker.

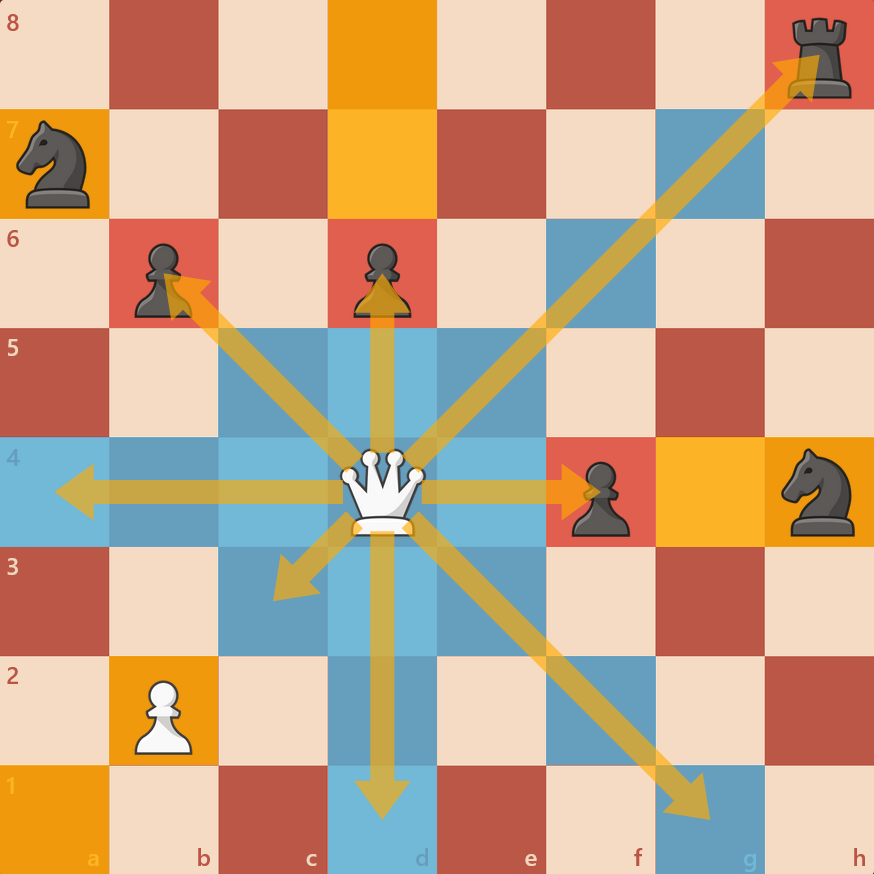
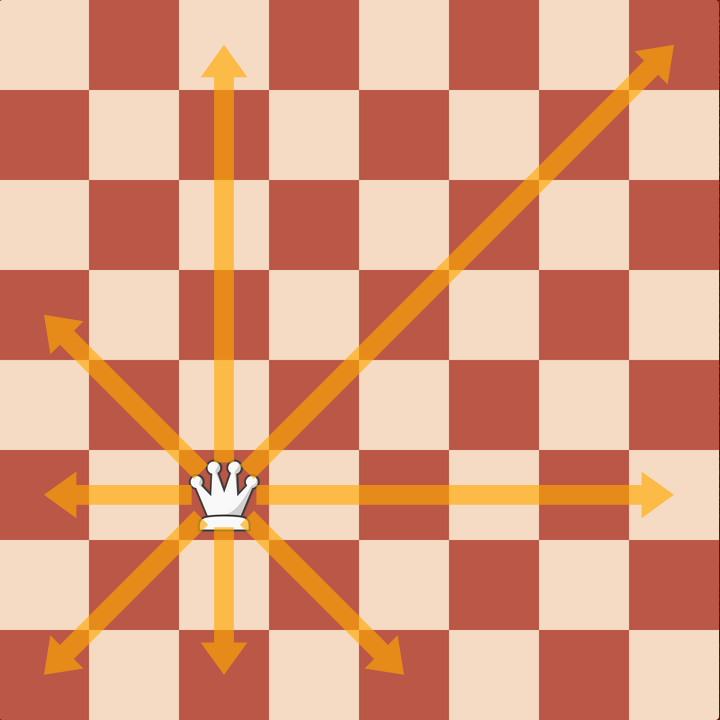
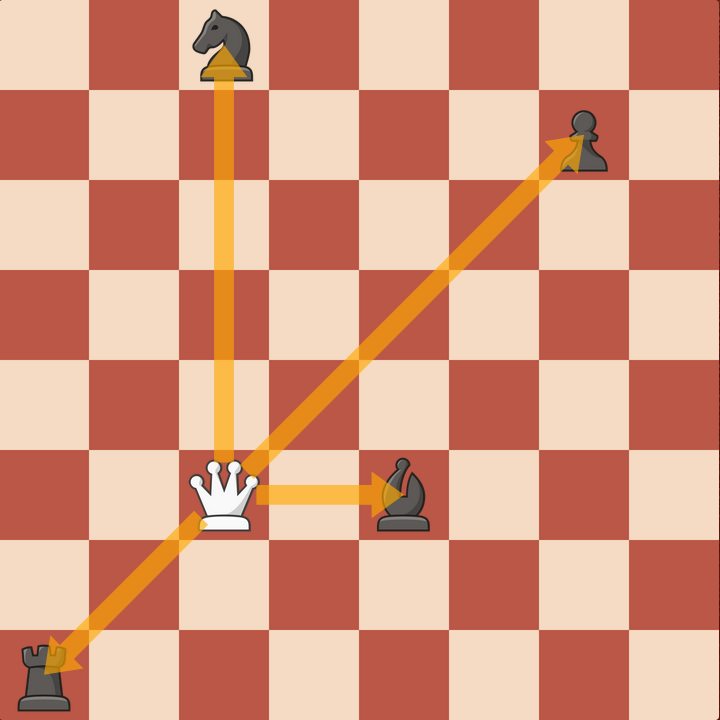
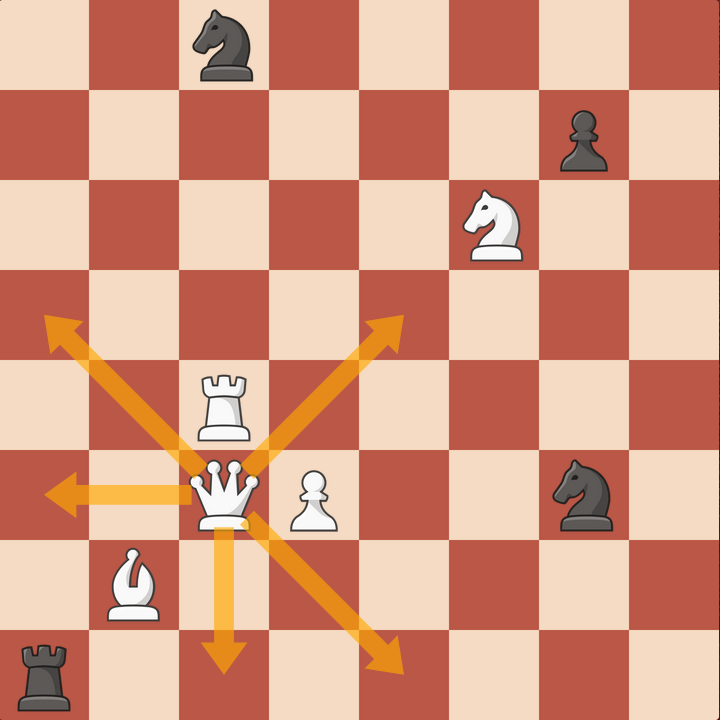
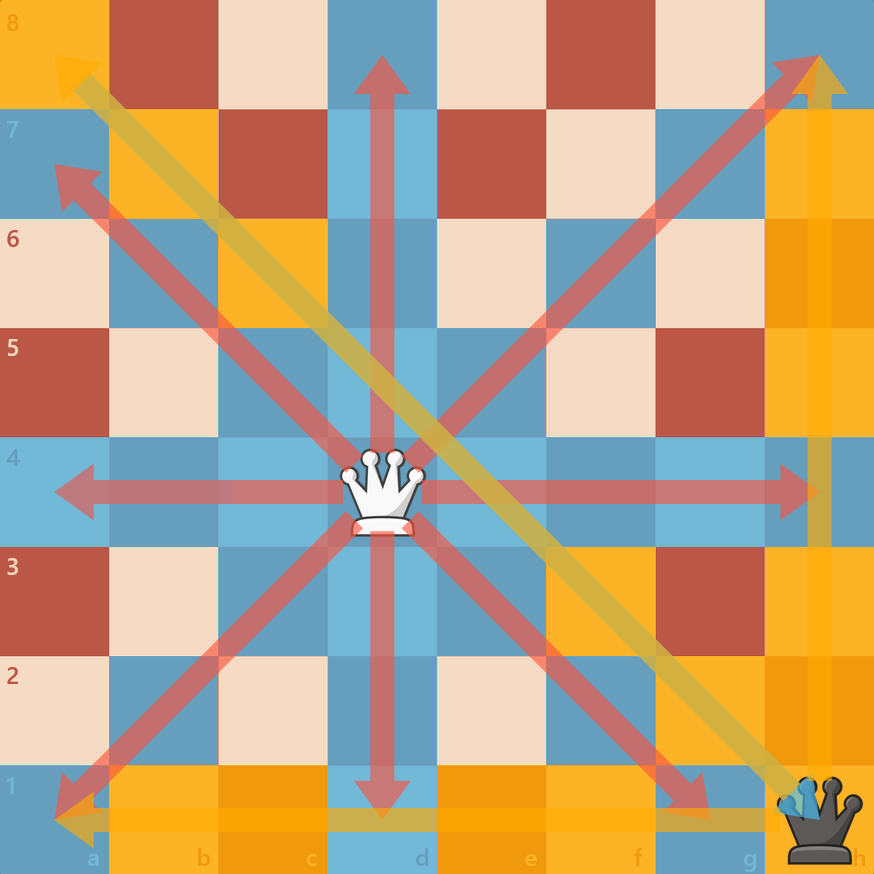
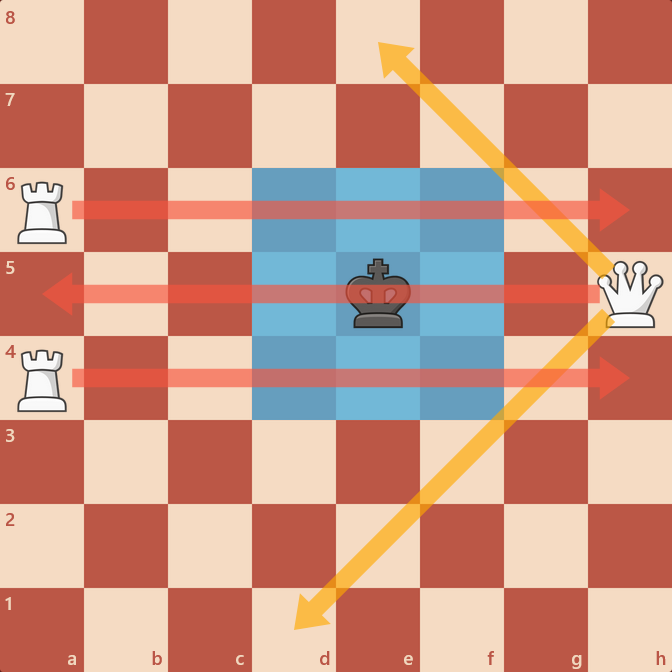
The Queen

The Queen can move and capture horizontally, vertically or diagonally, any number of squares, in a straight line.
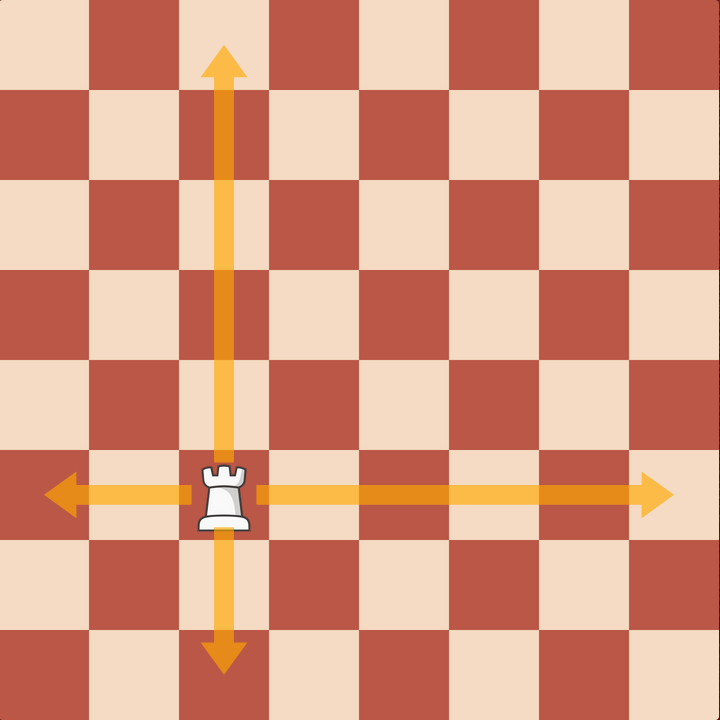
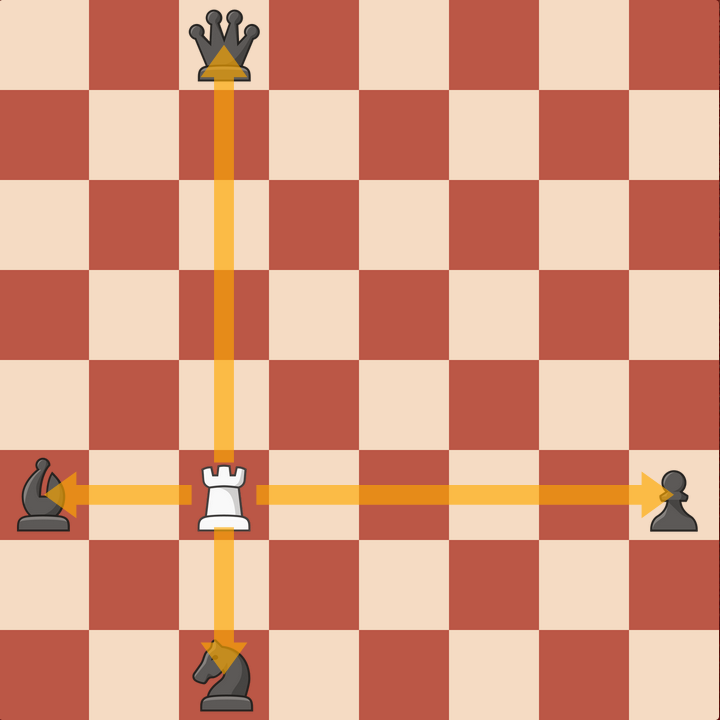
The Rook

The Rook can move and capture horizontally or vertically in a straight line.
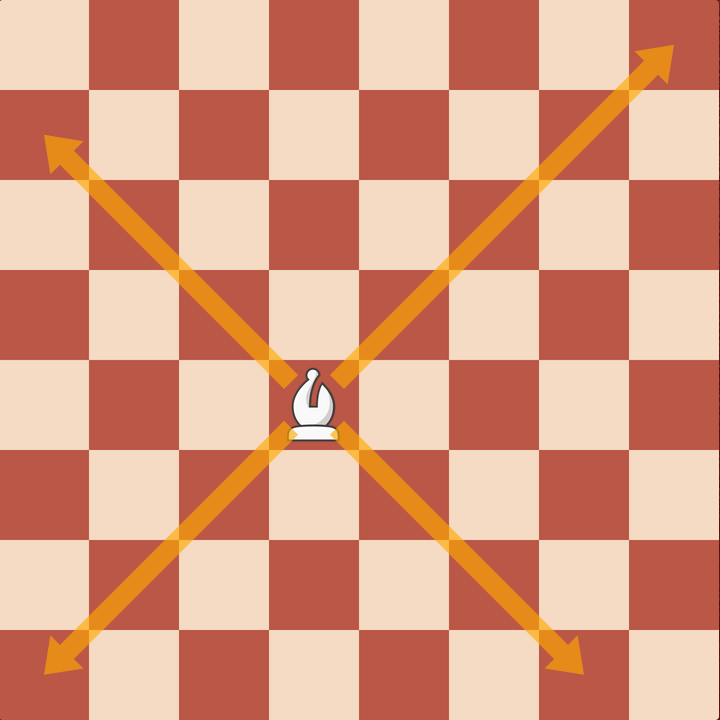
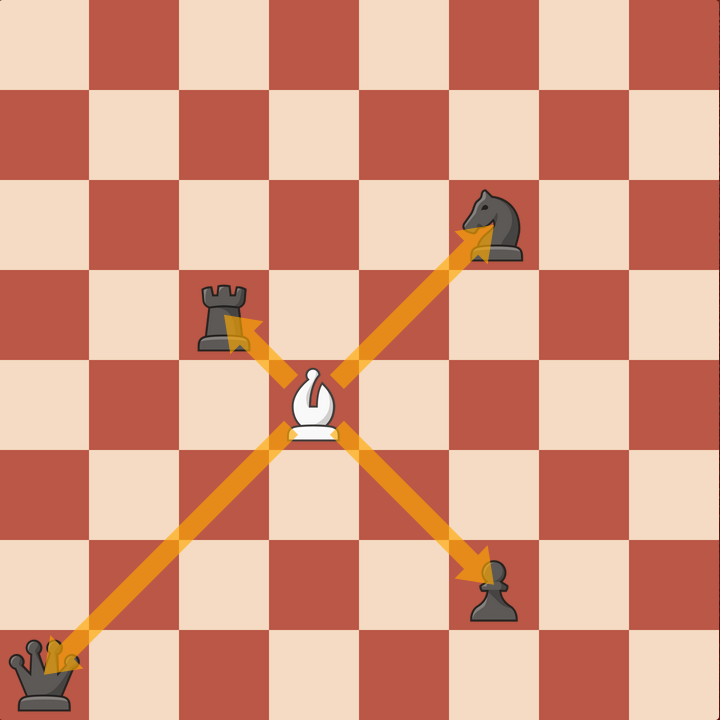
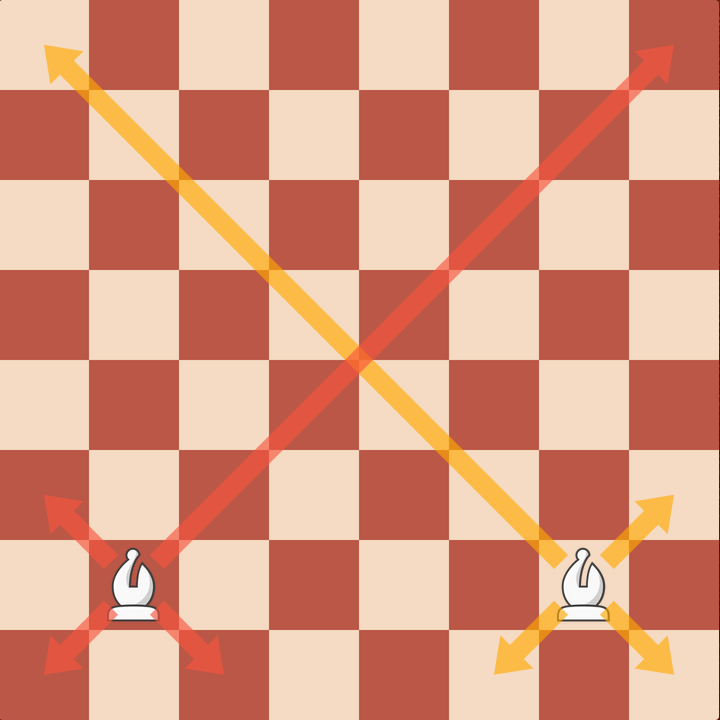
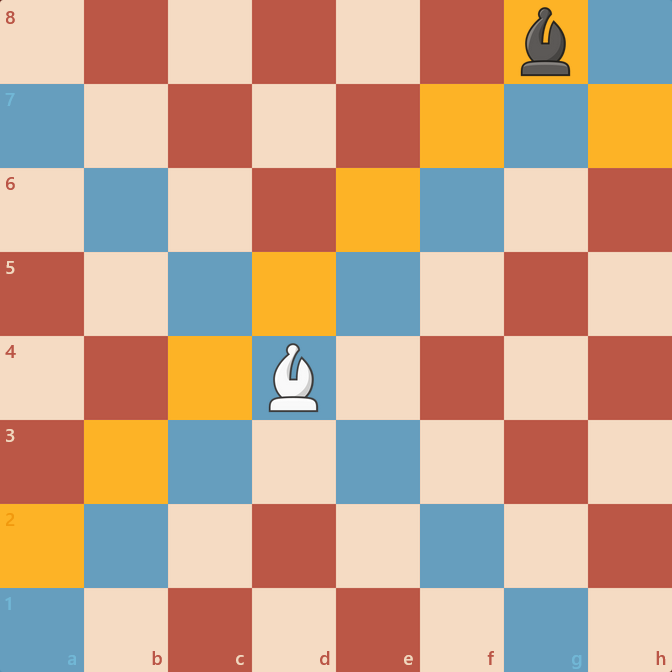
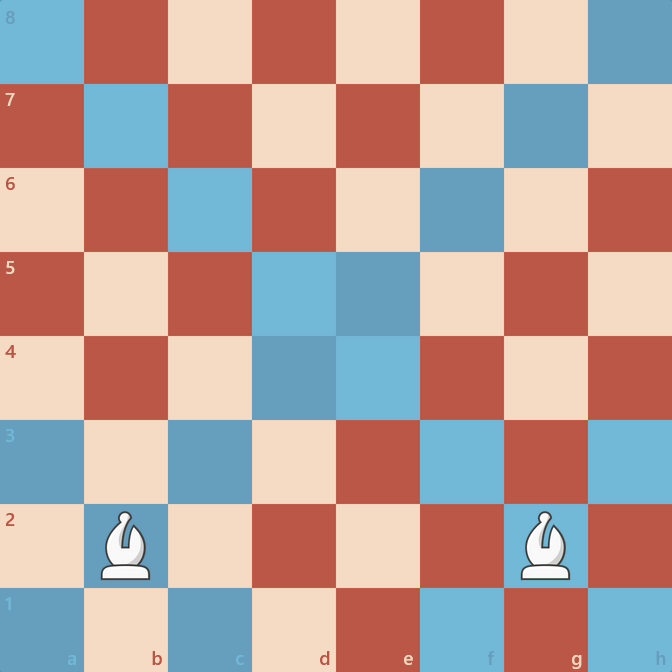
The Bishop

The Bishop can move and capture diagonally in a straight line.
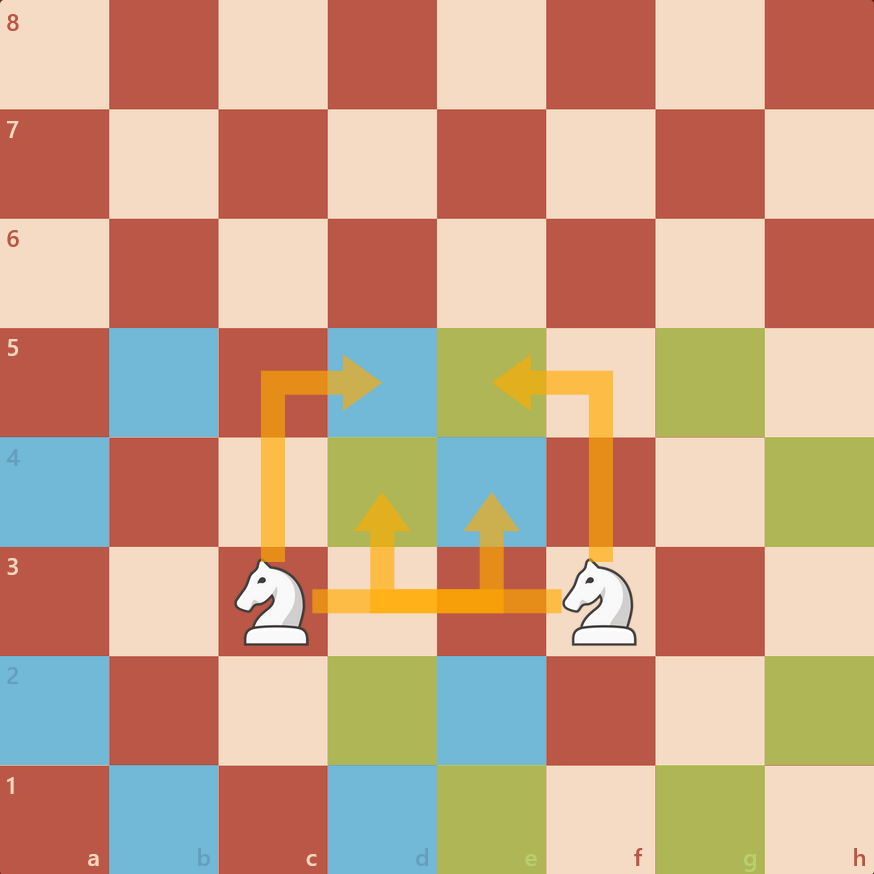
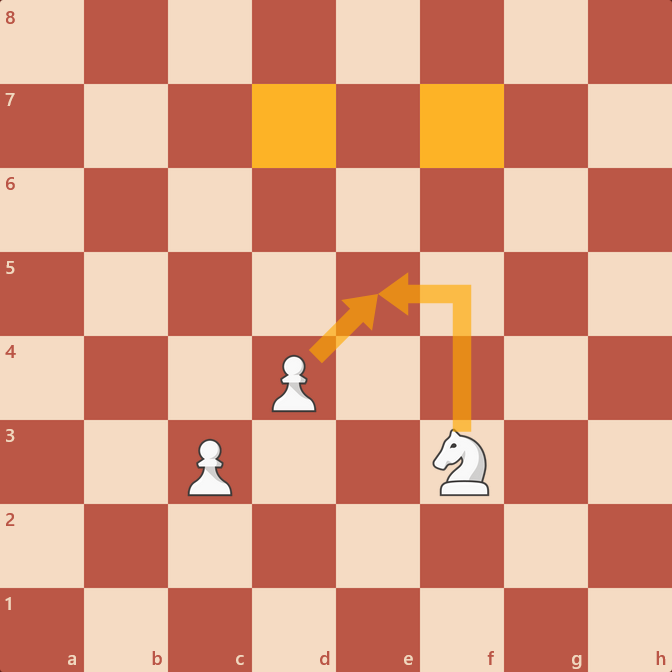
The Knight

The Knight is tricky. Here are 3 ways to describe Knight movement:

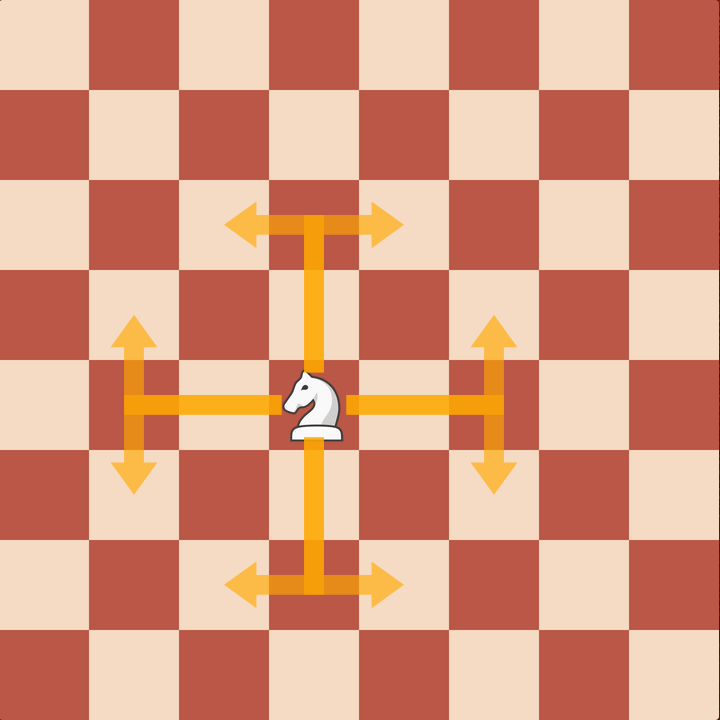
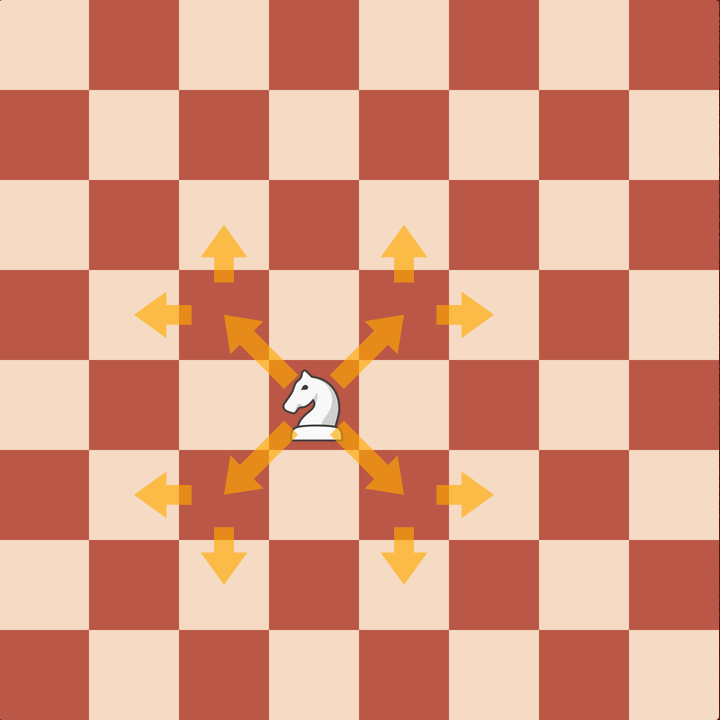
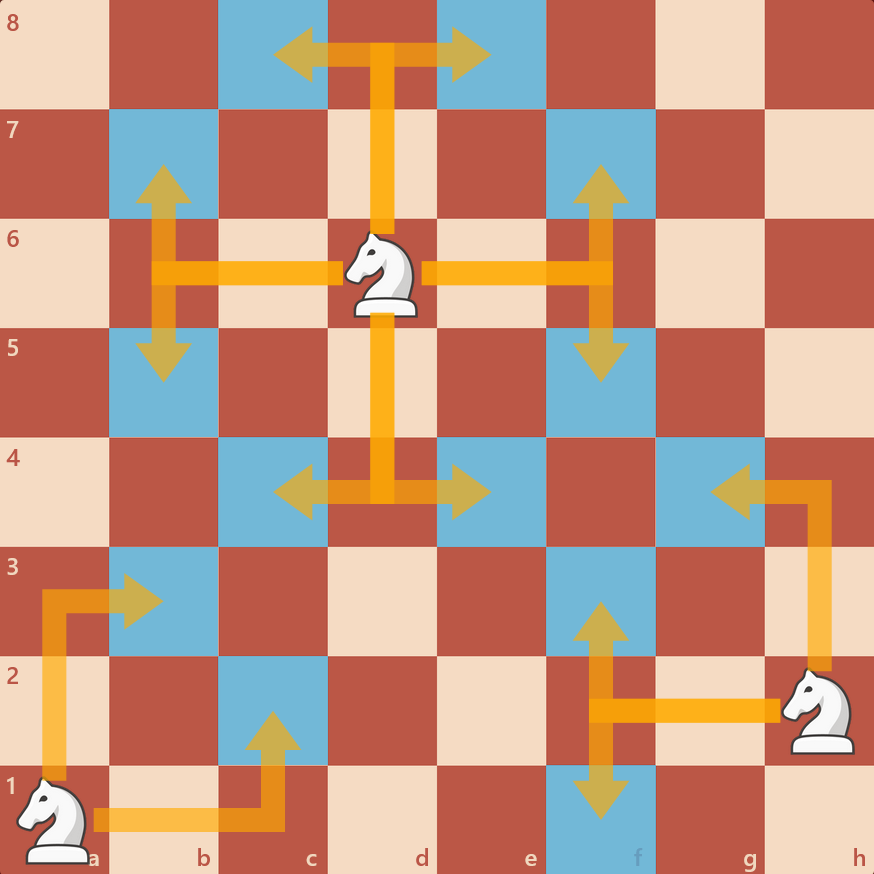
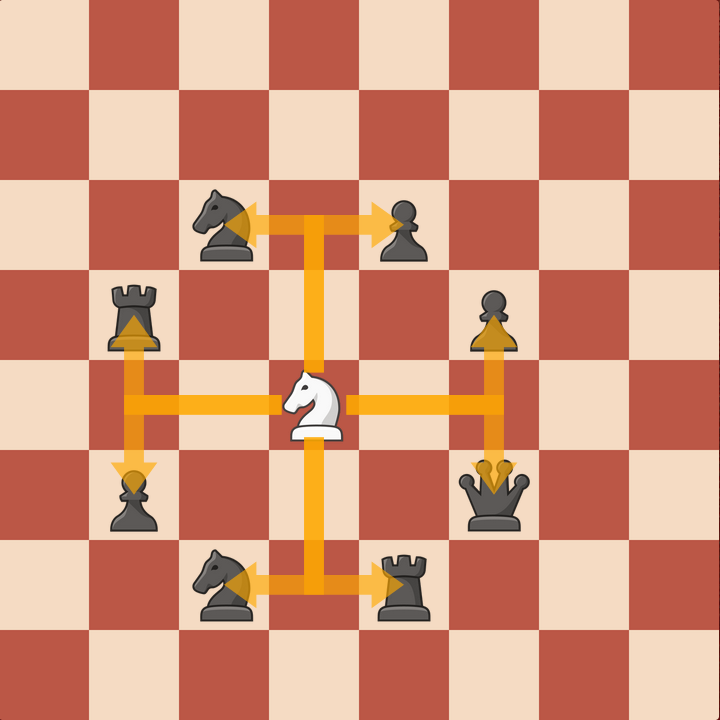
Note: the knight always lands on the opposite color of the square it jumps from, and it’s movement pattern resembles a circle. The Knight is tricky because it can take many paths to get to another square. Always try to consider where the Knight can go next and block that path.
The Pawn

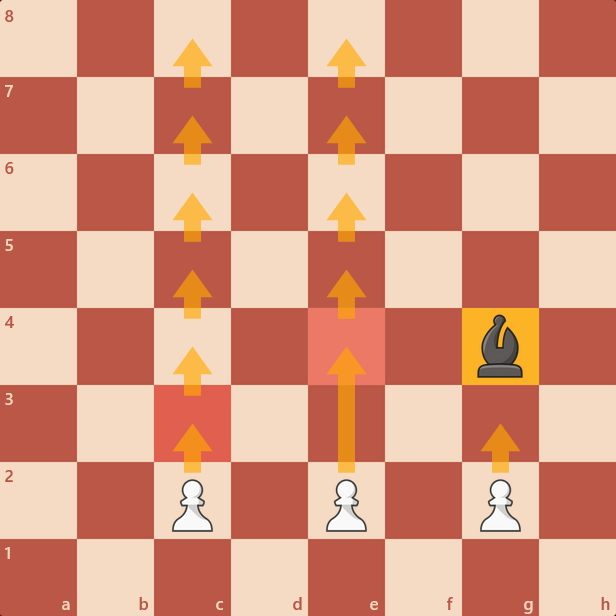
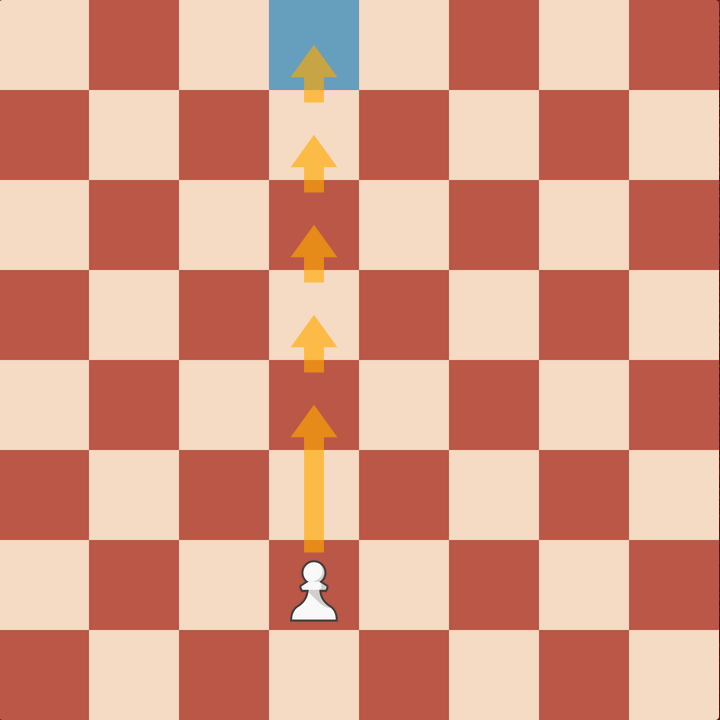
Any pawn that hasn’t moved yet can move forward 1 or 2 squares. After that, they move forward 1 square at a time. It cannot go backwards or sideways.
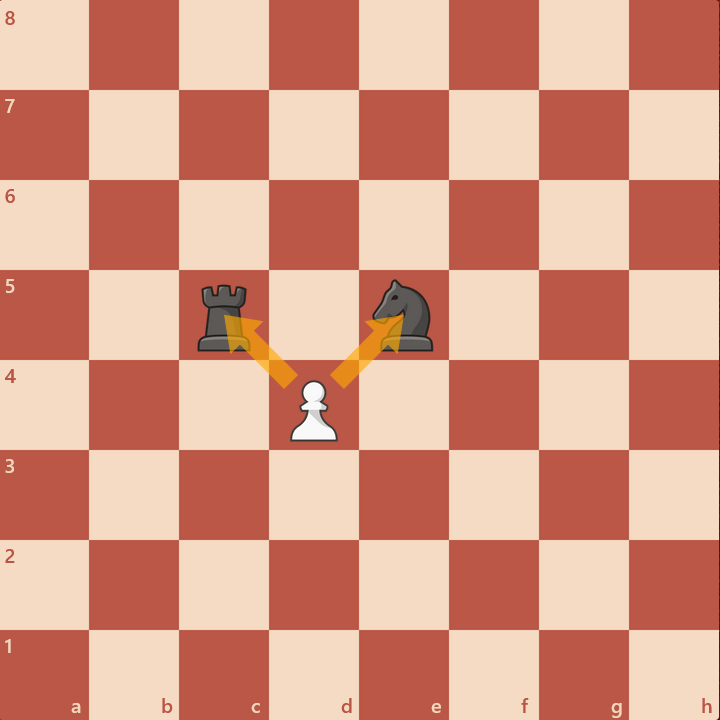
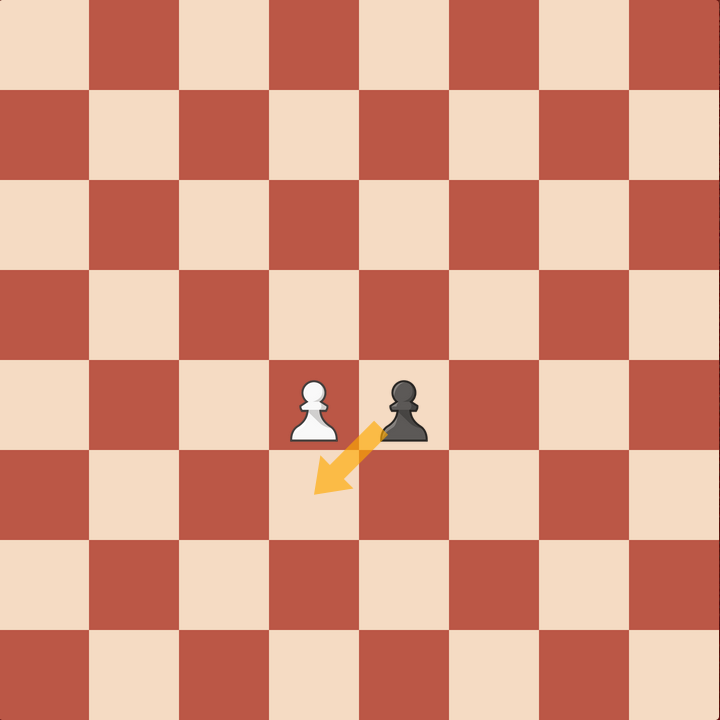
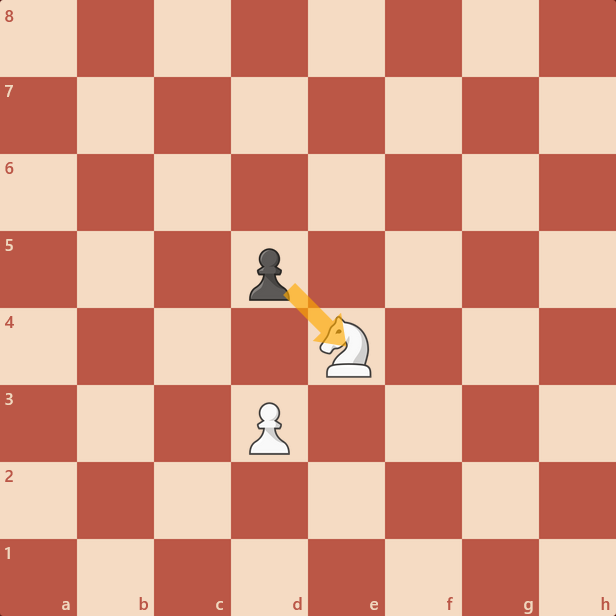
A pawn captures diagonally.
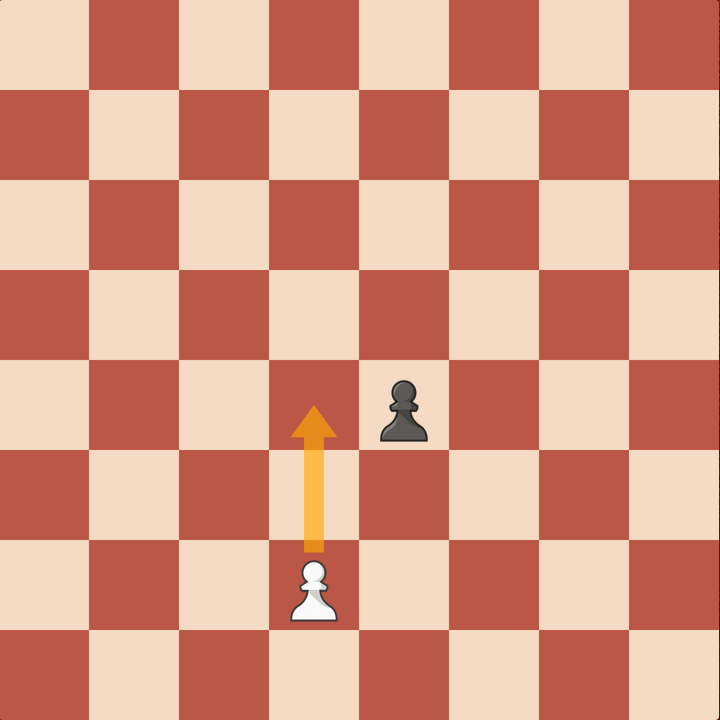
A pawn with a piece in front of it cannot move unless it captures diagonally. After it captures it continues forward on this new path or “file” unless it captures again.

Special Moves
Castling
Castling is a special King move. The King moves 2 squares toward a Rook and that Rook jumps to the other side of the King. It is the only move that involves moving two pieces. It can only be done once and only under special circumstances.
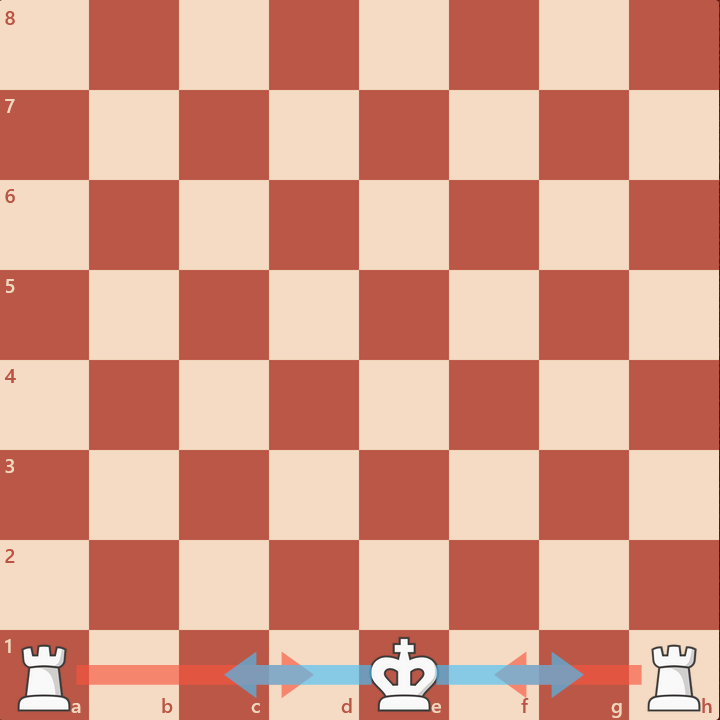
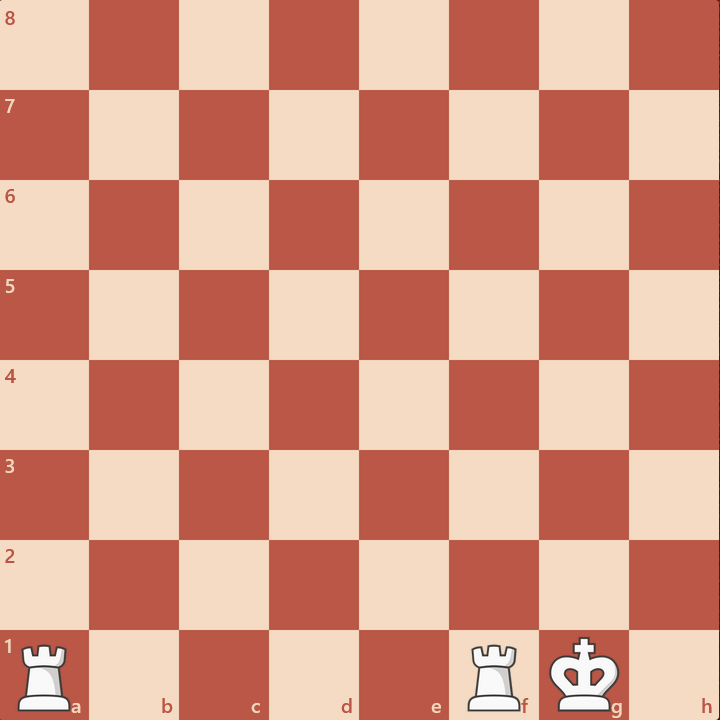
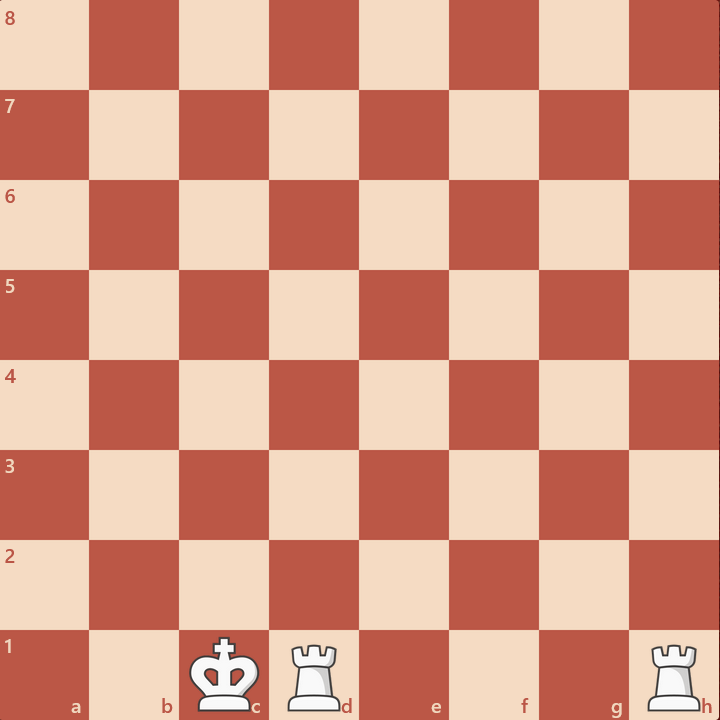
Castling may not be played if a) the King or Rook have already moved, b) there are pieces between the King and Rook, c) the King is in check, d) the King passes or lands on squares that are under attack.


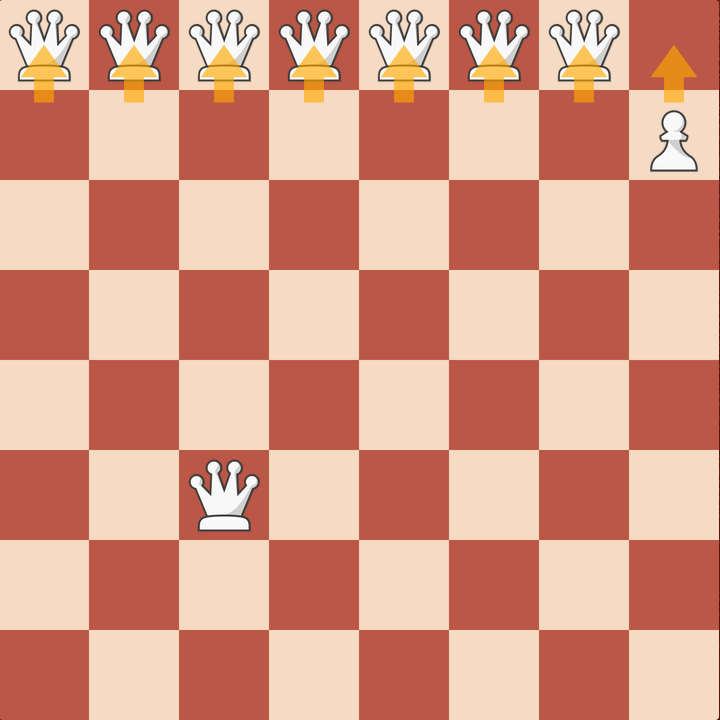
Pawn Promotion
When any pawn reaches the opposite end of the board it may promote to a Queen, Rook, Bishop or Knight.

Capturing En Passant (in passing)
If a pawn moves 2 squares on its first move and lands next to your pawn in the process, you have the option to capture as if the pawn had advanced only 1 square. This must be done now or never. Capturing this way is not required.
Strategic Concepts
Domination
Checkmate is the goal, but getting there is hard. You and your opponent have the same pieces and can both see the board. It is very rare they will not see your threats. Chess requires chipping away at the defenses and building small advantages until an opportunity is created.
Think more about the squares your pieces can access than the pieces themselves. Consider where the opponent can move, and try not to let them move there. Take up space by guarding squares. Limit their options. Force them to make a bad move.
Consider the consequences of each step before you take it. Coordinate your pieces to protect each other and guard the squares you want to move to. Win the battles over space and gradually overpower the opponent.
Relative Value
Chess has no score, but to help a player determine the difference between a good move and a better move, one can consider the relative value of the pieces:
Pawn = 1, Bishop = 3, Knight = 3, Rook = 5, Queen = 9, King = Infinity
Threaten the opponent’s higher value pieces with your lower value pieces, and try not to lose yours the same way. Combine piece values to determine the logic of complex situations.
Control the Center
The center is the most important zone of the board. Every piece can maximize its potential coverage in the center and has the best access to the other parts of the board. Place your pieces in the center or aim them at the center.

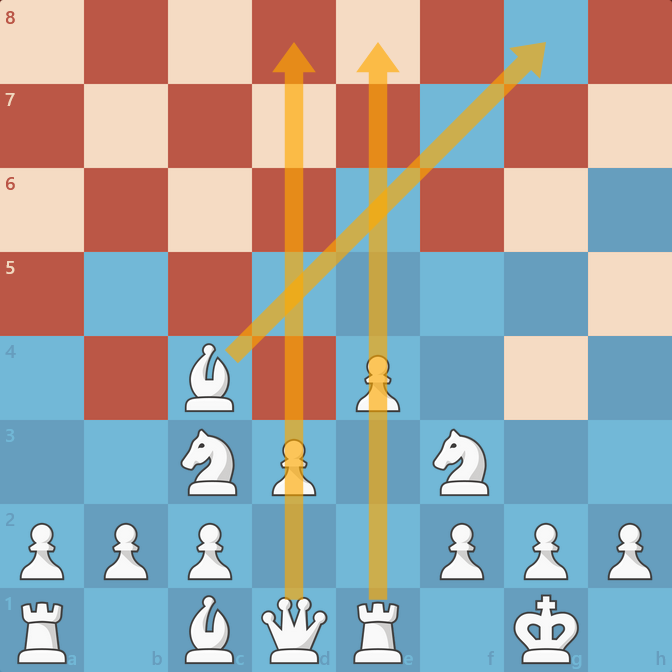
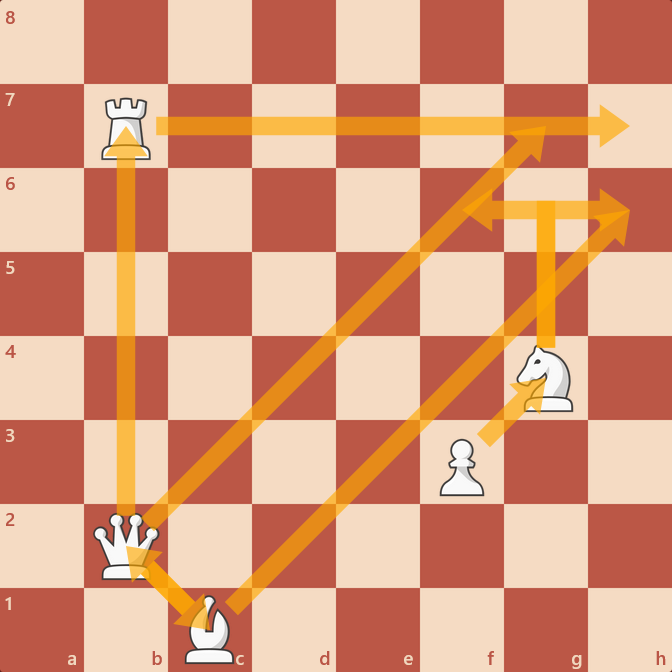
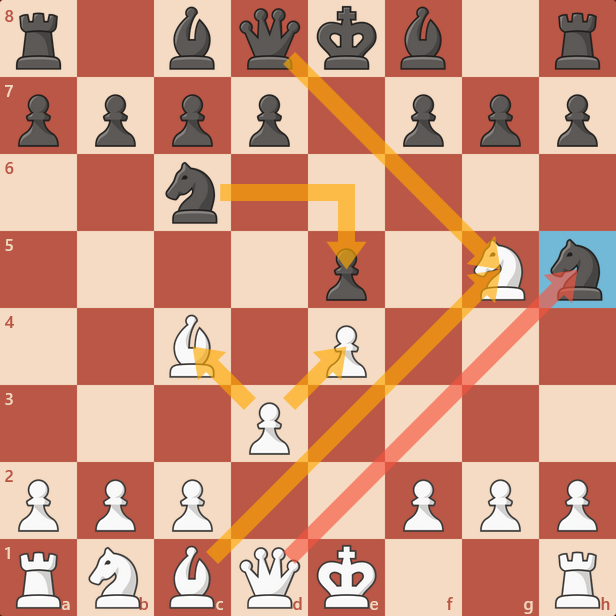
Developing
Since the center is so important it’s imperative to target those squares as quickly as possible. Get your pieces off the back row and into the game! But do it carefully. Don’t over-extend. Build defenses like scaffolding or a bridge. Guard squares you’d like to move to and move to them. Aim multiple pieces at the same squares from multiple directions. There are only 64 squares. Take up space.

Tempo
Tempo is the concept of time in chess. Not minutes and seconds, but turns. Chess is a turn-based game and most games last 30-60 turns. You can’t afford to waste turns especially in the beginning. Besides taking up space and controlling squares, you can gain an advantage by taking turns away from your opponent. If you develop faster you can dictate what happens next and make moves that force the the enemy to respond. This wastes their time. It’s like getting multiple turns in a row.
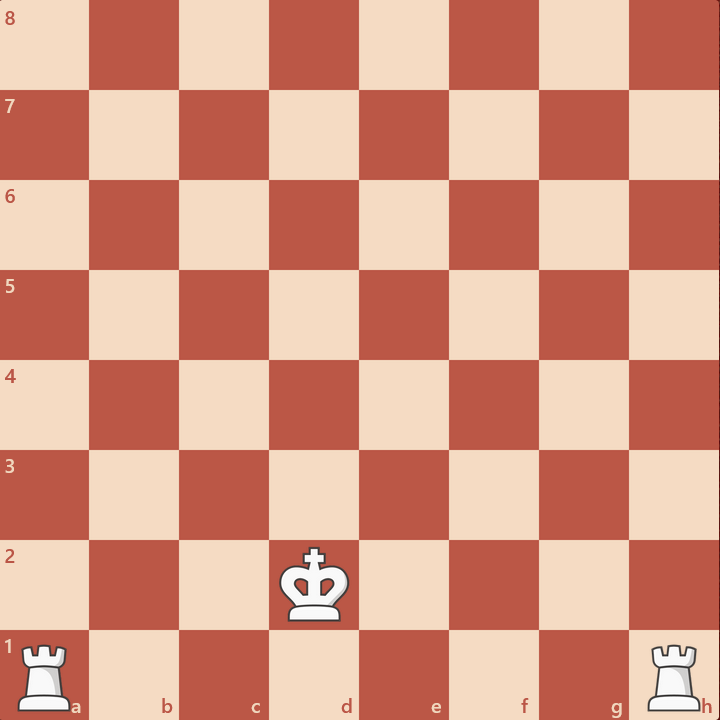
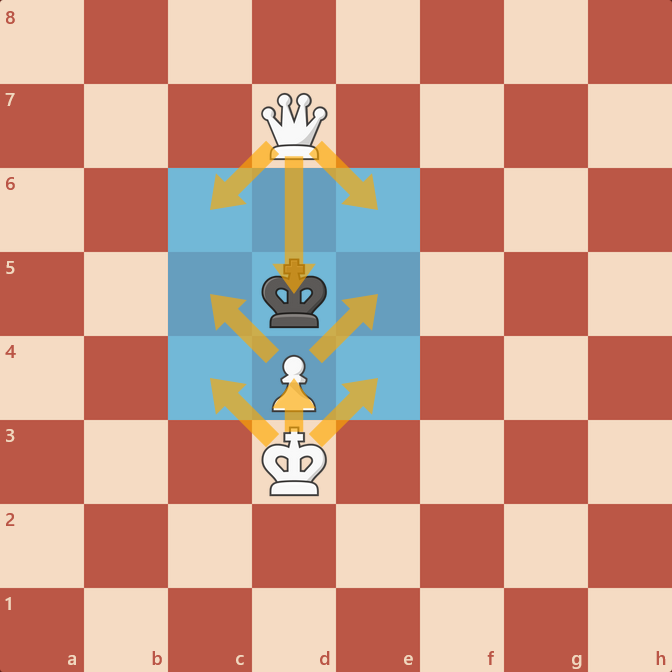
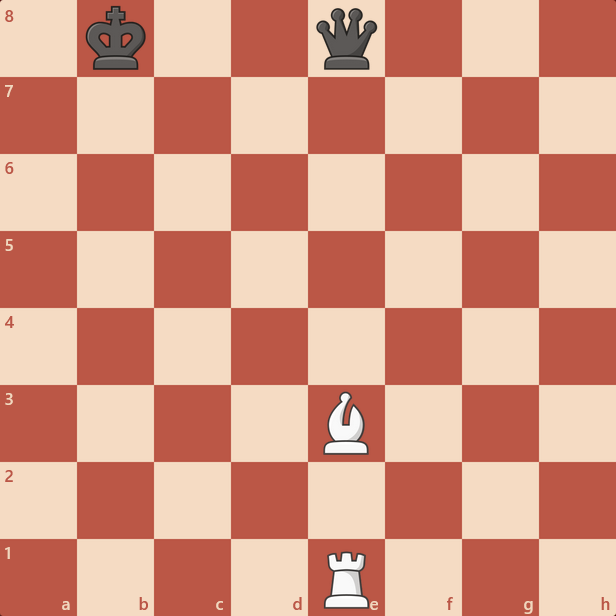
Checkmate
The king takes up 9 squares. It stands on 1 and has 8 it can go to. Your job is to take them all away. The king cannot ever be under attack, and there for cannot move into an attack either. Use your pieces to attack it and cut off its escape, and use the opponent’s pieces as barriers. That’s how to create a Checkmate.

Stalemate
If you take away all the kings squares but do not attack it directly and it cannot make a legal move on its turn, this creates a draw and is called “Stalemate.” Avoid this mistake if you have the advantage. Force it if possible if you are losing.
Basic Tactics
The previous concepts were strategic. To make a strategy work you need tactics. Tactics are smart ways to use the pieces to apply the strategies.
Free Pieces
If you find a piece that is just sitting there, capture it! But try not to leave your pieces free for the taking. This goes for pawns too you need as many pieces as you can keep!
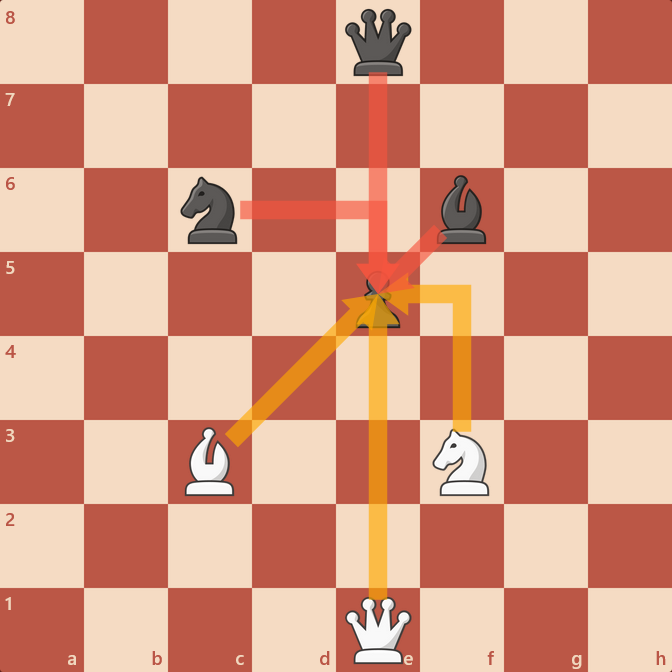
Attackers vs. Defenders
Your pieces can’t fight alone. If you lost a piece for every one you captured you wouldn’t gain any advantage and it would be harder to win. You need to combine your pieces. Very often a battle will build over a certain square. The player who can add more pieces will win the battle.


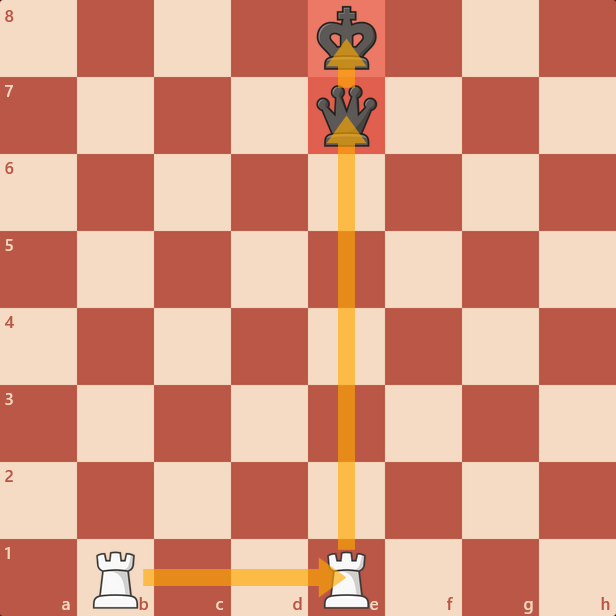
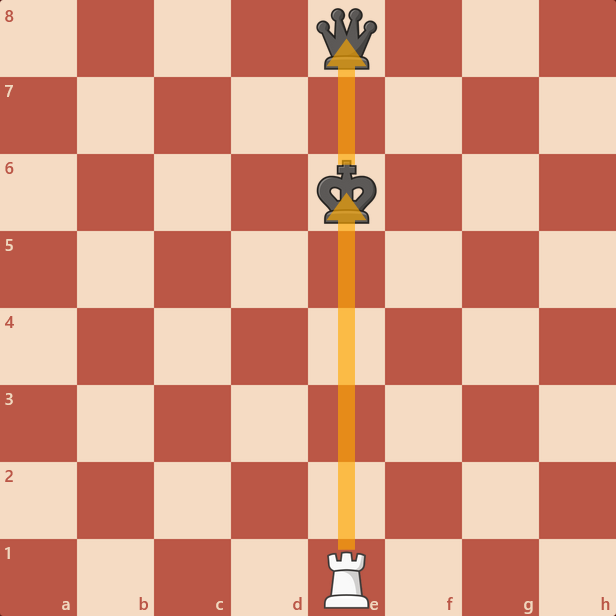
Mate in 1
Recognizing when you (or your opponent) have checkmate on the next move is very useful. When you know what to look for, you can learn to set it up. Here is a very small selection of patterns to think about.
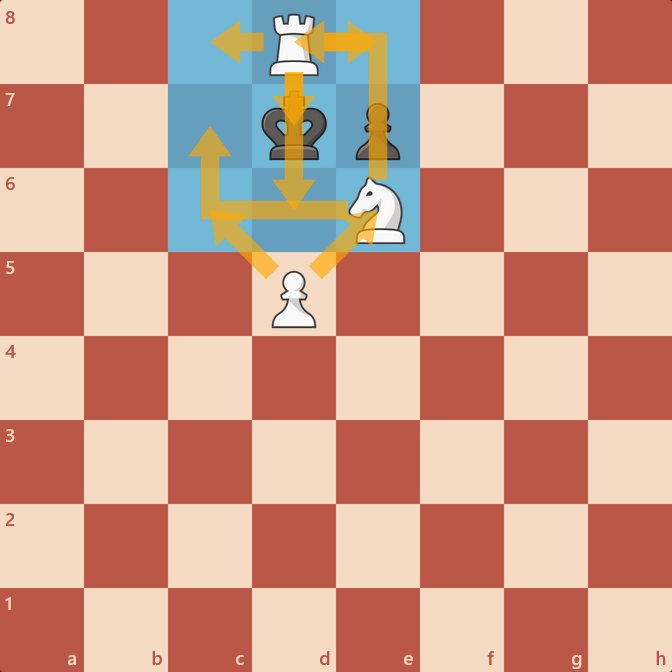
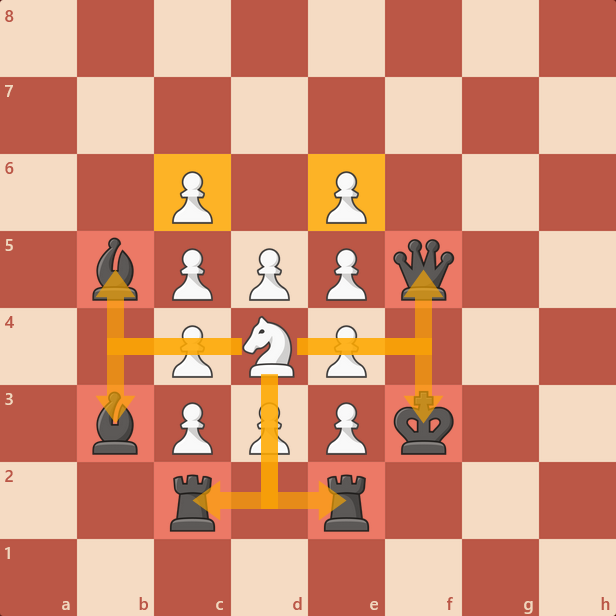
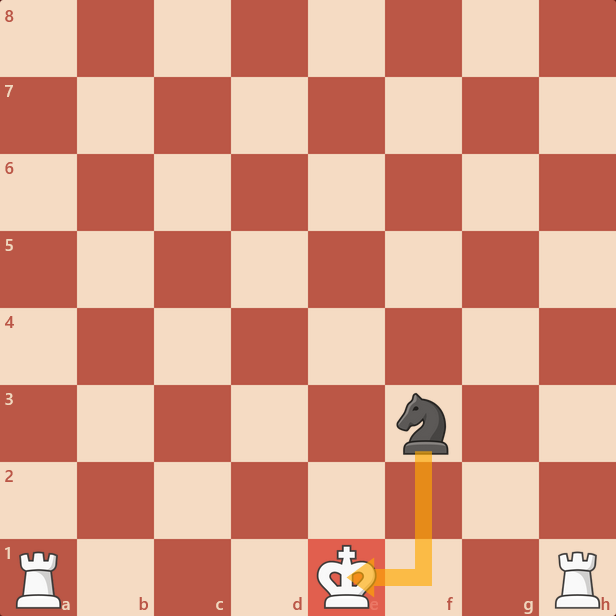
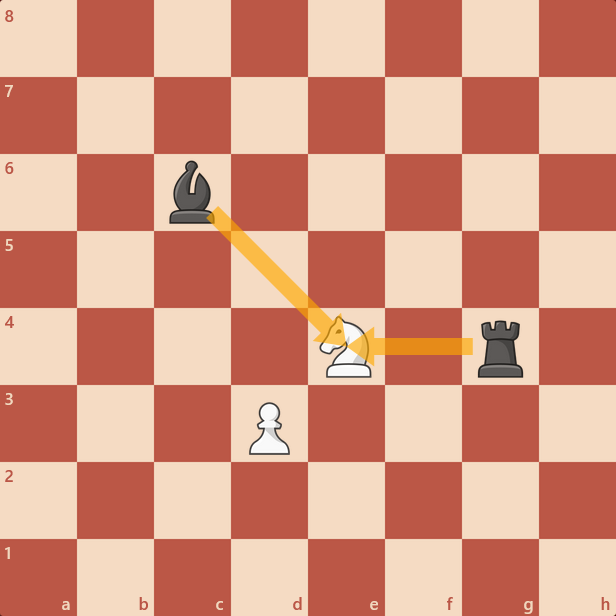
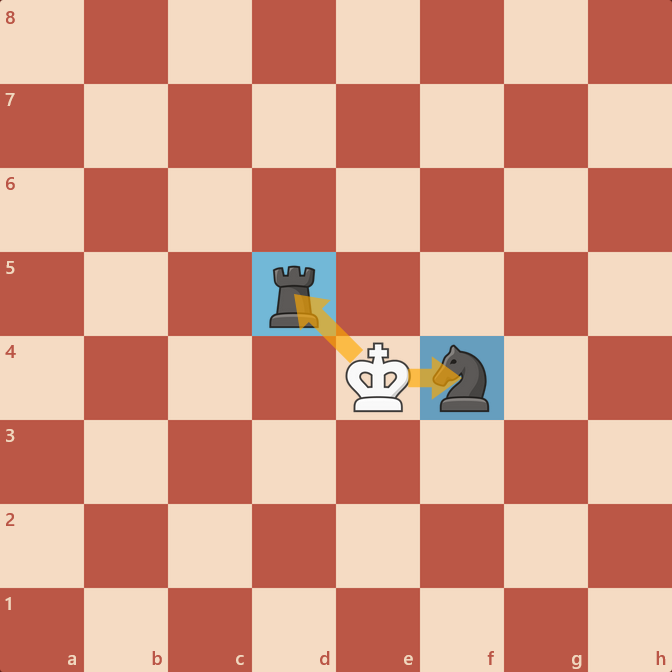
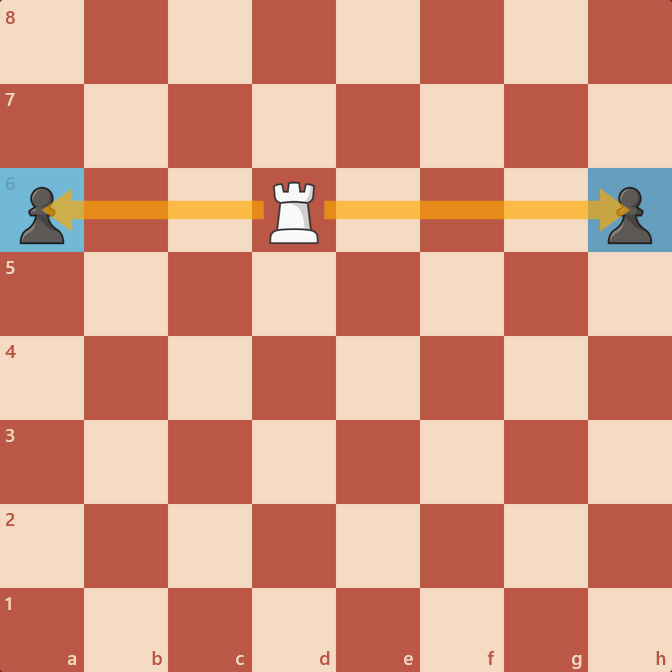
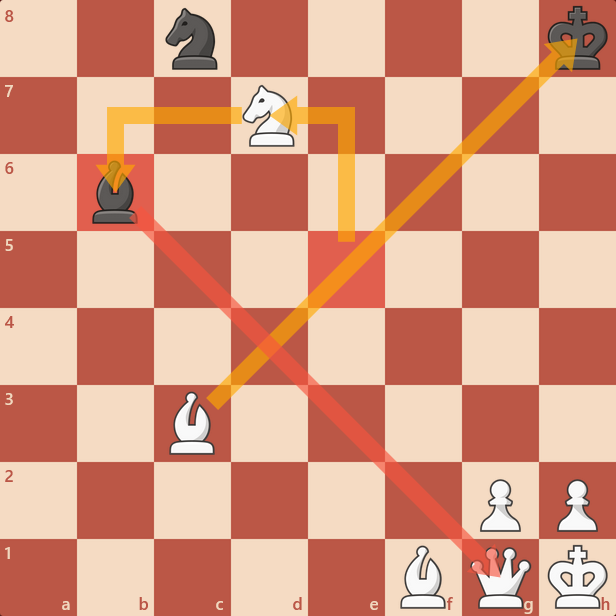
Fork
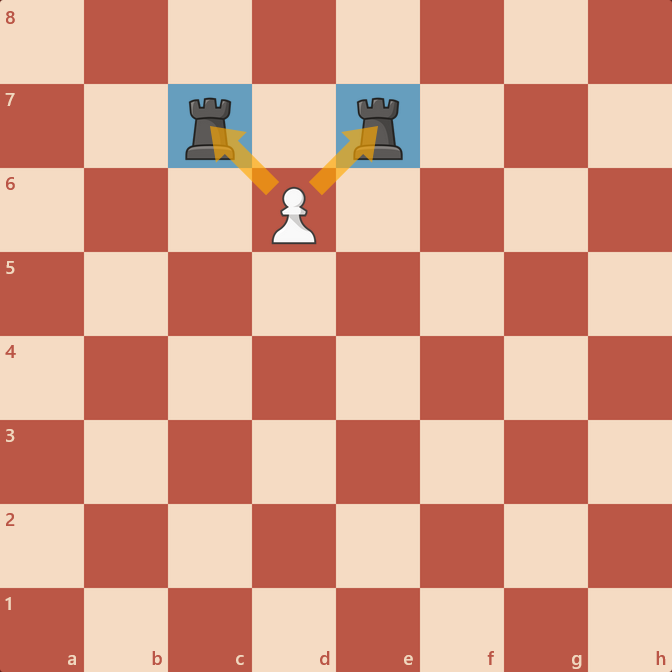
A fork is when one piece attacks twice or more at the same time. Every piece can create a fork. One piece will have to move and the other will be captured.

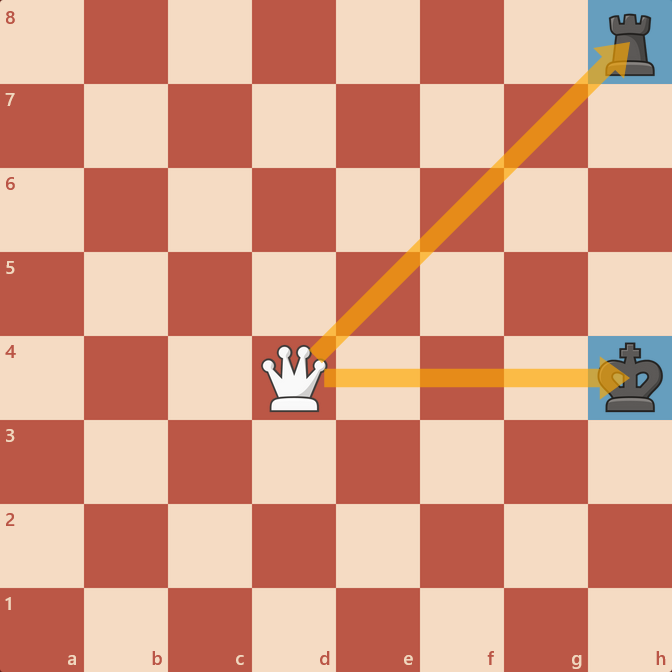
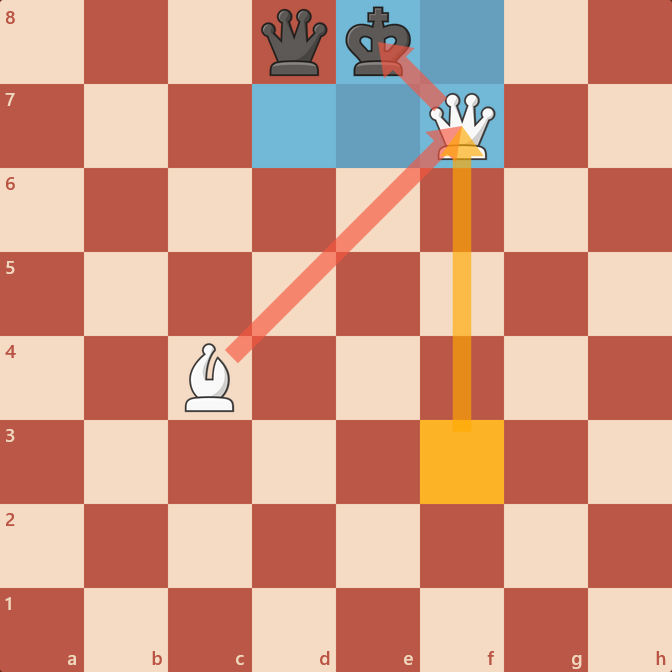
Pin
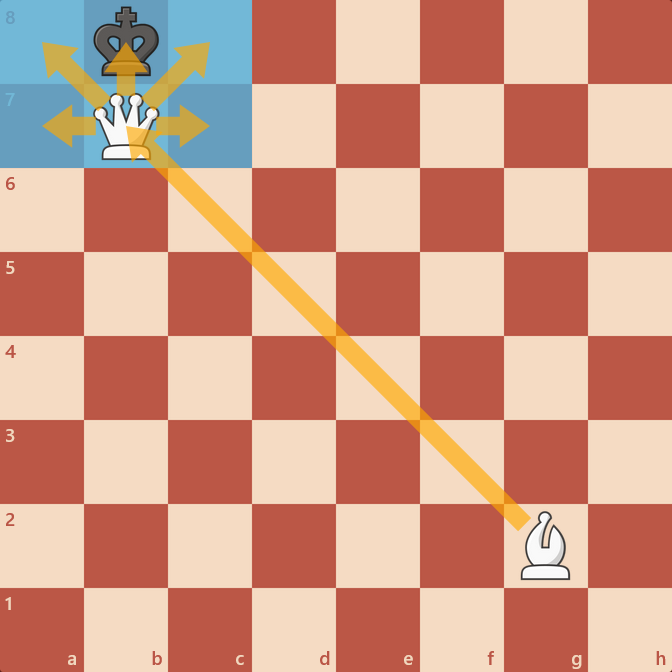
A pin threatens a more valuable piece behind the one you are attacking. You can use pins to keep a piece in place, or force a capture.
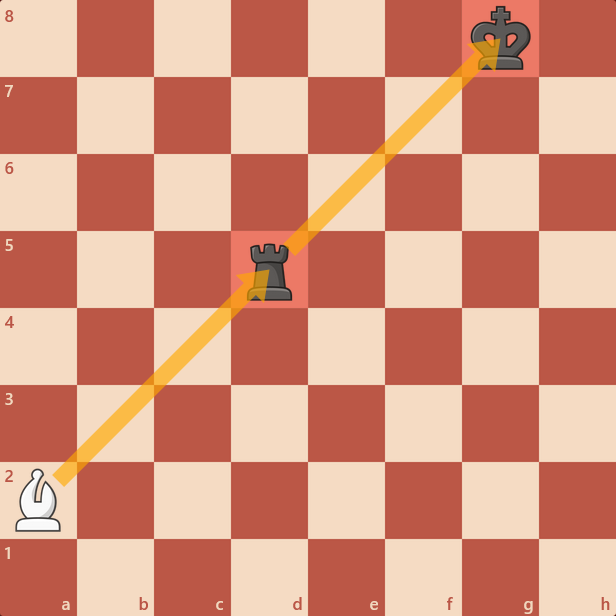
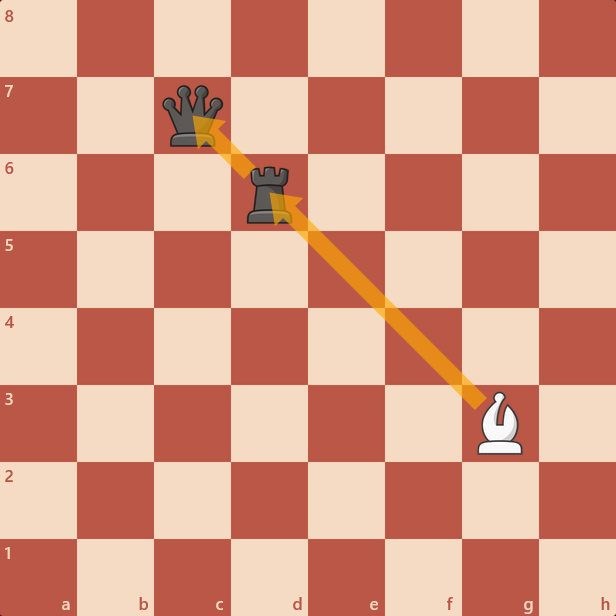
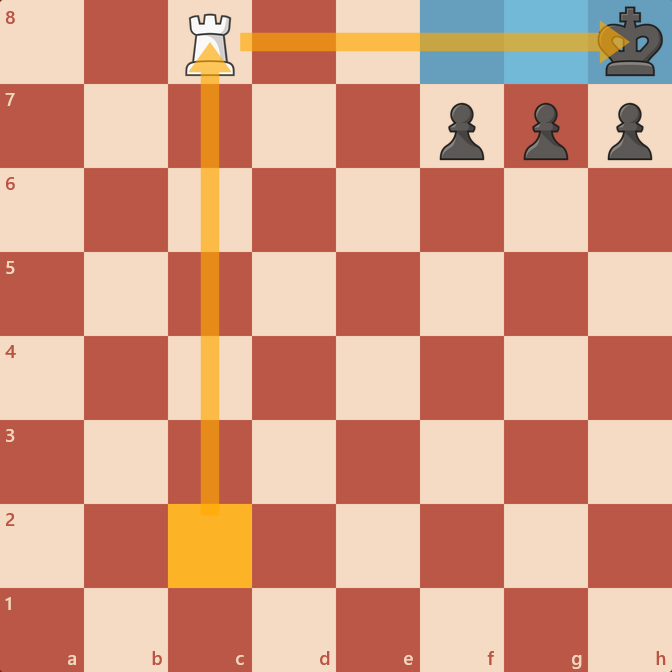
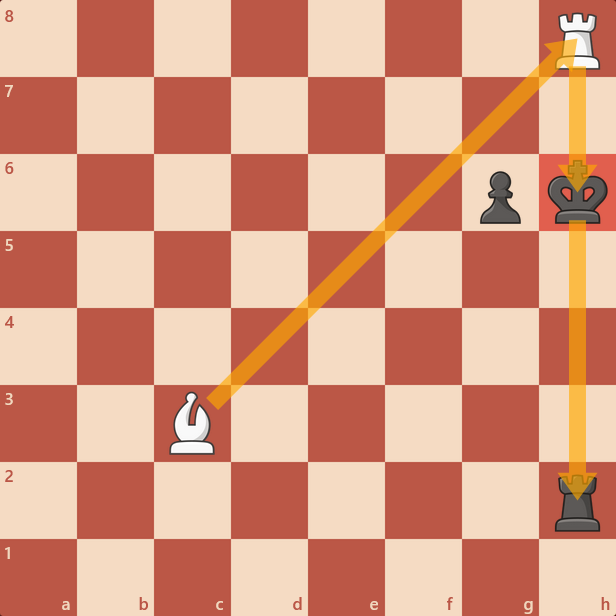
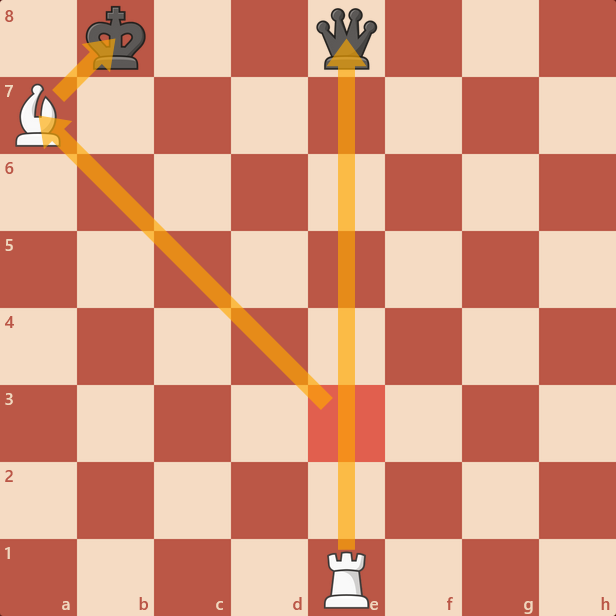
Skewer
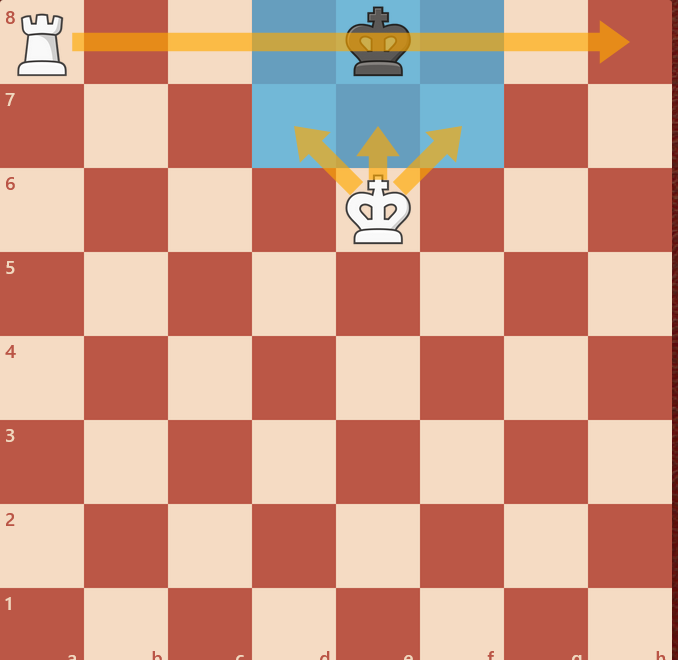
Attack a valuable piece to make it move so you can capture another piece behind it. (Usually a King or Queen)

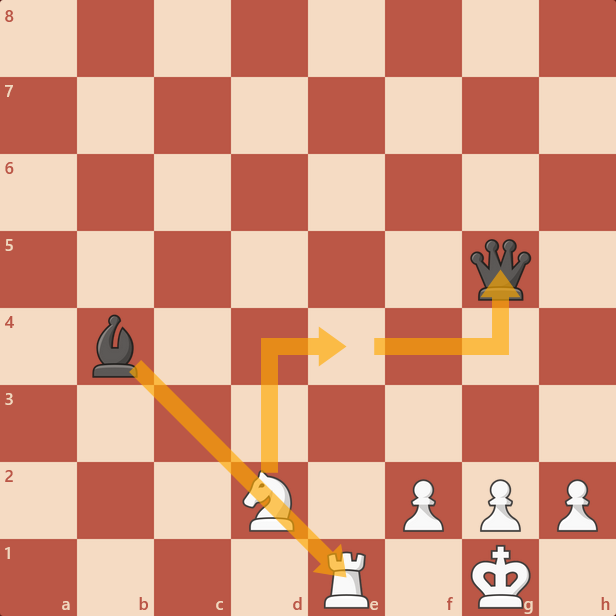
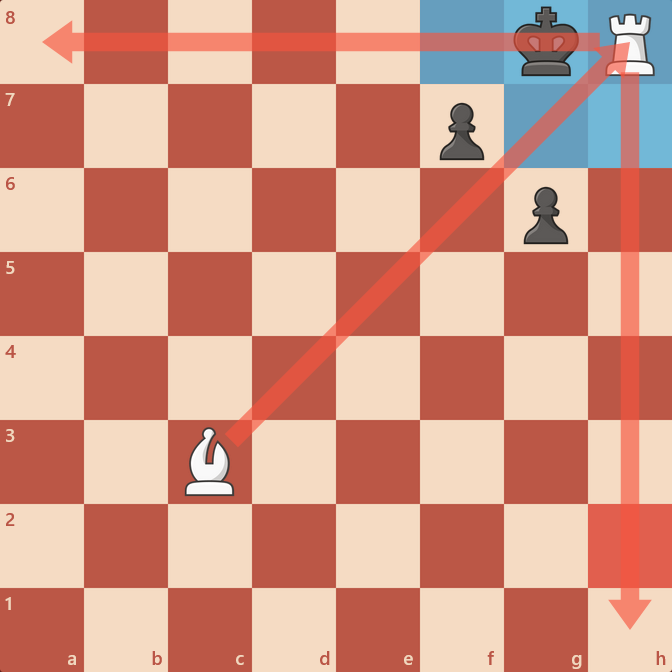
Discovery
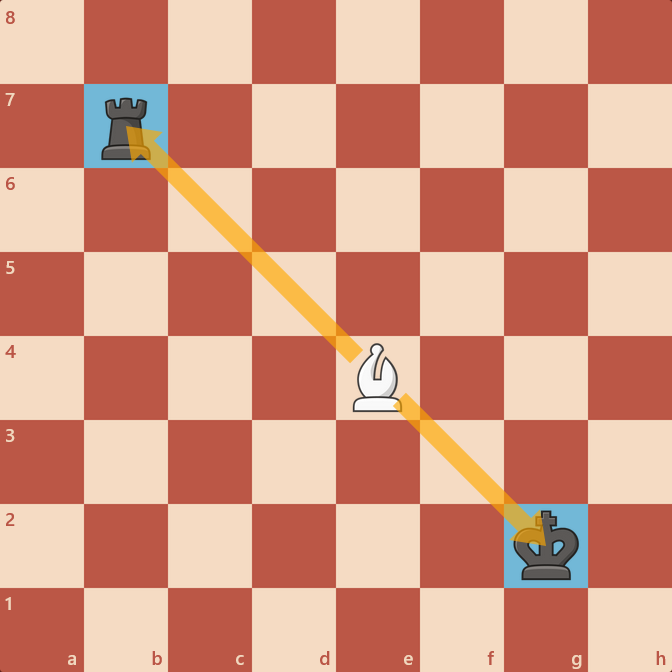
Move your piece to reveal an attack from another piece behind it.
There’s tons more but this is enough to get you started! Check out our resources page for more great chess related content to help you build on these basics.